Crease Fly

Tying the Crease Fly
Recipe
Hook – Gamakatsu SL12S preferred, alternatively Mustad Big Game Light or Gamakatsu Siwash. 3/0 or 4/0 for large flies. 1 or 2 for small flies.
Thread – Flat waxed white or red.
Tail – Fishhair, Superhair, Bucktail. Preferably an opaque material for silhouette properties, softer materials like craft fur can be used, but only on top to add colour, otherwise fly will tail rap while casting.
Flash – Flashabou or Krystal flash
Body – 2 – 3mm foam sheet. Must be strong enough to cope with casting etc. White is best, but colour is not crucial most of the time.
Eyes – 3D stick on type.
Glues – Fast drying super glue to attach body e.g. zap a gap. 5 min epoxy or UV clear coat for protective body coating at the end.
Optional extras – Spirit based permanent markers or paint to add colour, fright stripes,spots etc. Glitter nail polish or prism tape to add body flash.
Tying

Stage 1 – Lay down thread base to point of hook.
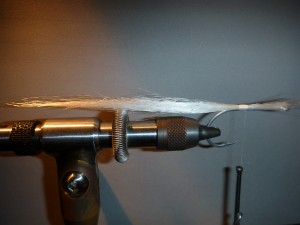
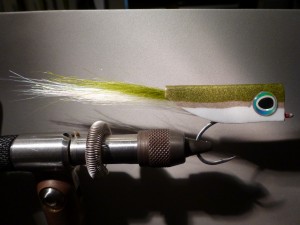
Stage 2 – Tie in small tapered bunch of fishhair for tail approx 2 x hook length (chosen material must have medium stiffness to avoid fowling)

Stage 3 – Tie in tapered flashabou (8 strands or so)

Stage 4 – Tie in small tapered bunch of craft fur (or chosen material). Topping material is most often a slightly darker colour than tail base. Cut off excess and bind back over to eye of hook, tie off (whip finish) and cut thread. Now that this blank is finished you may also want to pre tie a batch of these and set aside ready for foam bodies. Tying a few of these in one sitting helps maintain a bit of continuity in the finished flies.
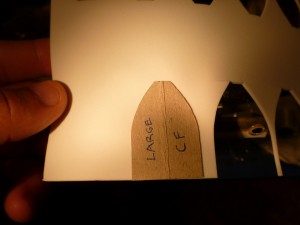
Stage 5 – Using a cardboard template of desired shape and size (make your own or copy a fly that works for you) cut the bodies from the foam sheet, sharp scissors are best.
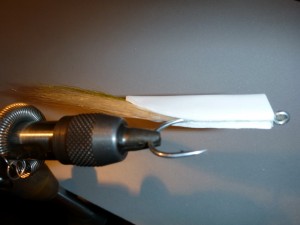
Stage 6 – Crease (fold) foam cutout in half to form body ready for gluing.

Stage 7 – Apply a good covering of fast set gel super glue to both sides of thread binding, from hook eye to base of tail. Then position creased foam body onto the glued surfaces so that both edges of foam almost or just meet on underside of hook shank. Pinch body there with fingers or a bulldog clip along hook shank until glue sets (10mins).
While glue is setting it is crucial to check the foam bodies alignment, if it is not perpendicular to the hook (eye and gape) and is offset (skewed) in any way the finished fly will spin! (Not good). Also be sure to pull the tail up slightly towards the crease to avoid fouling of the finished fly while fishing.
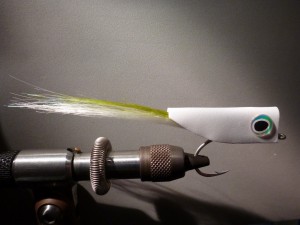
Stage 8 – Stick on self adhesive eyes. Sometimes a dab of super glue will help them be more robust.
Stage 9 – Now if you prefer this is the time to apply marker pen to your desired bait fish pattern (darker back, fright stripes, spots etc) and some red to the mouth opening. Colours are optional not essential. This fly has a coat of silver glitter nail polish for a scaled effect applied before final coating. At this stage a small tear drop shaped piece of foam may also be glued into the front of the foam body (near hook eye) to widen and cup the face some more adding further to the flies popper like action.
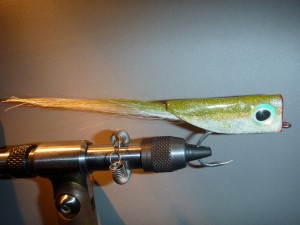
Stage 10 – To finish fly and add durability coat the entire body, edges, face and under the hook shank with a coat of 5 min epoxy or UV clear coat and allow to dry.
Fish fly on a floating line with a monofilament leader for best results.