Tying the ‘Ultimate Shrimp’
A Jon Makim fly designed for the flats, this fly is a clear water specialist.
Recipe
Hooks – Preferred types – Gamakatsu SL12s, Mustad signature S/S O’Shaughnessy or Big game lights. Preferred sizes – 2 for small version, size 1/0 for larger version.
Thread – Danville’s Fine monofilament tying thread.
Weight – Medium Brass hourglass (small version) or Large Brass Hourglass
(larger version). Preferred in silver colour
Mouth parts/Body/Tail – Unique hair in White (clear), Peach, Tan, Smoke grey or Polar bear.
Eyes – EP crab & shrimp eyes or home made on monofilament stalks.
Feelers – Midge (krystal) flash in Tan, Pink, Orange or Rootbeer.
Legs – Crazy legs (silicone) in Clear/pearl flake or Salt N Pepper flake or Shrimp pink/pearl flake etc.
Body Dubbing – Wapsi SLF dubbing tan or Seals fur dubbing etc.
Shell/Body – UV cure fly finish or 5 min epoxy.
Finished flies
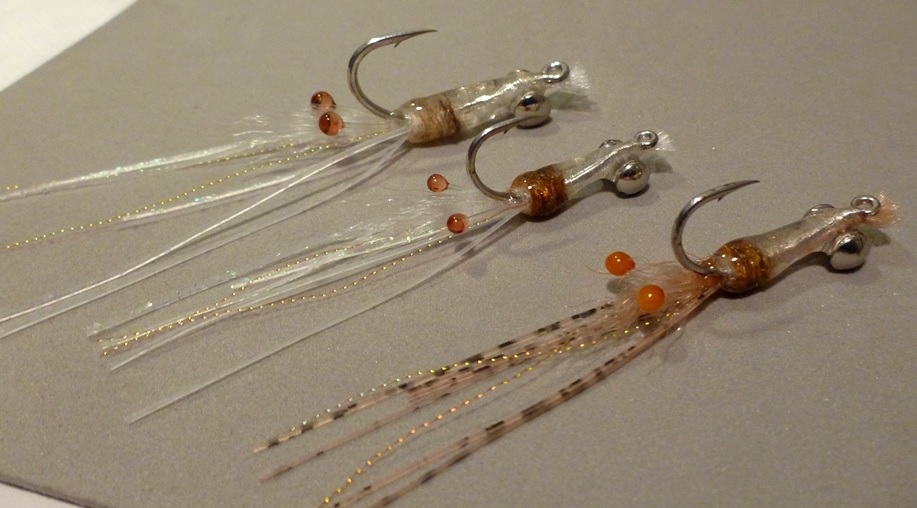
Sometimes called the Hinchenbrook Shrimp and other names this fly is usually tied in natural colours with very little or no flash, it is a non-threatening, fast sinking fly with most of it’s movement coming from the silicone legs. If presented correctly it’s advantage is it’s quick to settle on the bottom, doesn’t spook the fish and usually requires only very small if any stripping by the angler to elicit a take . Some of the species best targeted with this fly are : Bream, Trevally, Permit, Bonefish, Sweetlips, Emperor, Flathead etc.
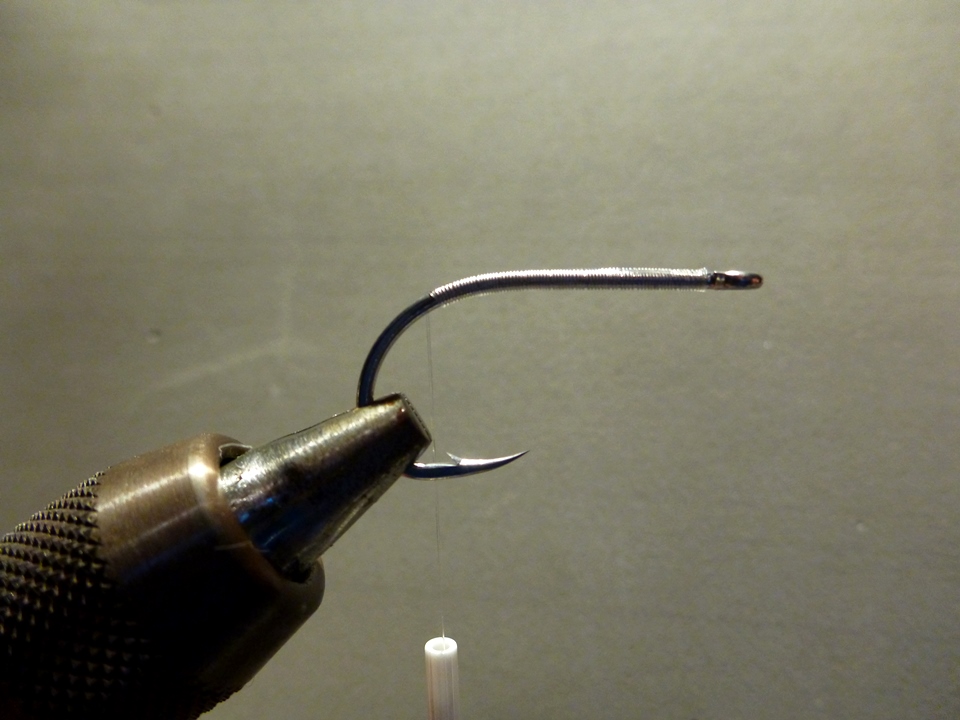
Stage 1 – Lay down a mono thread base to just behind the hook barb.
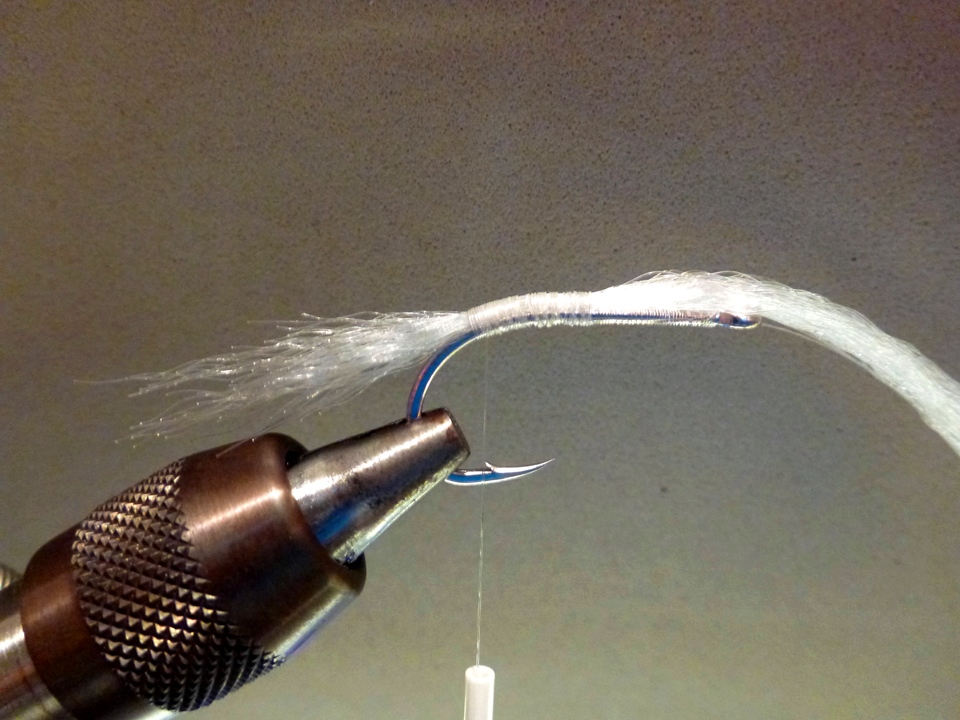
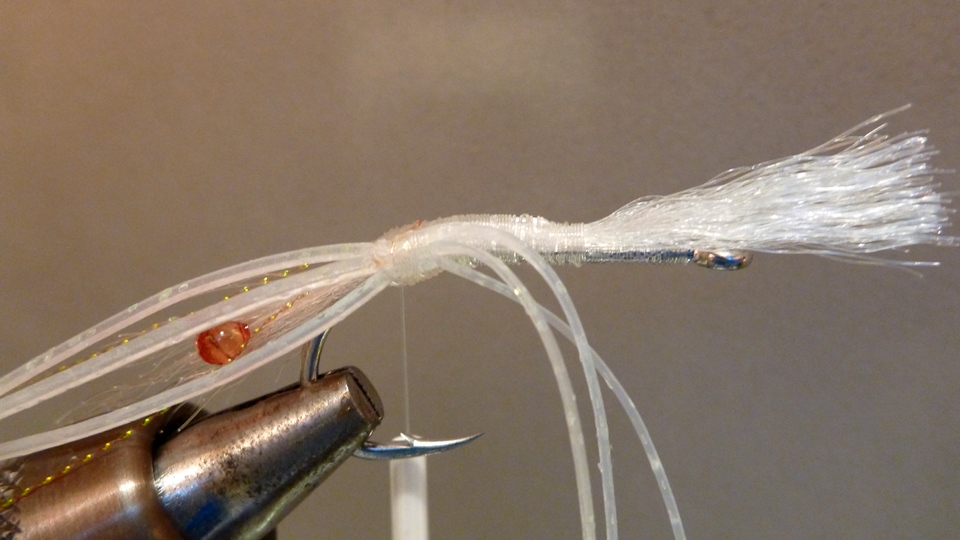
Stage 2 – Tie in a small bunch of tapered white Unique hair on top of the hook shank extending about 15mm behind the tie in point to form the shrimp mouth parts, leave the remaining material extending back over the hook eye OR trim off about 5mm over the hook eye if you prefer (this will form the tail at the end).
Stage 3a – The following three steps are optional, you can simply tie the eyes in as is, or to make the tying in and positioning easier and prevent them rolling around the bindings follow these steps : Take the selected mono eyes, hold them in position (eye ball approx. 4mm or so behind the hook bend) then take note or mark the tie in point on the mono stalk.

Stage 3b – Now with some flat jawed pliers squash the mono stalk at the tie in point.

Stage 3c – These squashed/flattened sections will make the mono eyes much easier to position and tie in just where you want them.

Stage 3d – Tie in the two eyes, one either side of the hook/mouth parts. Trim off the mono stalks (cut at an angle) roughly half way along the hook shank and bind down over the cut ends then work the thread back to the front (first tie in point).
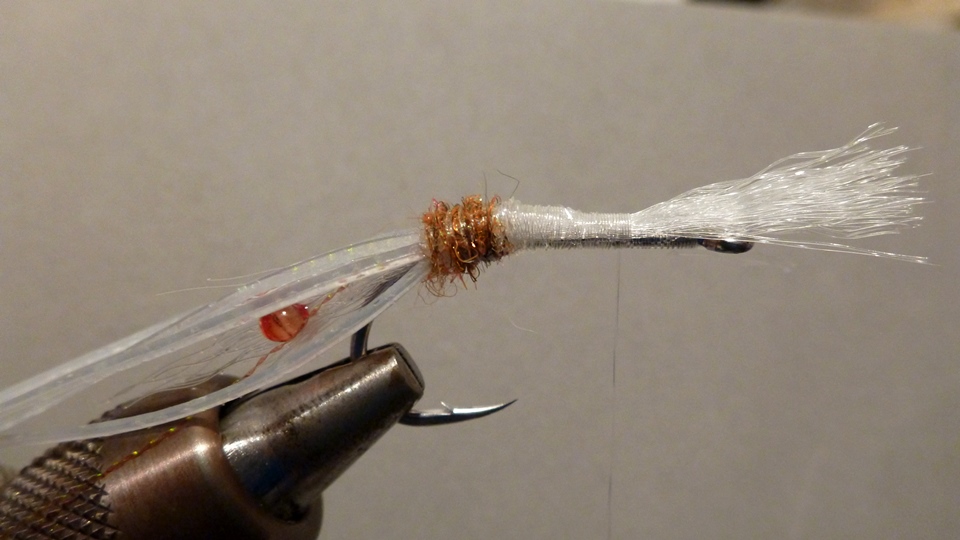
Stage 4 – Tie in 1 strand, folded in half of tan Midge krystal flash extending down each side to form two feelers (optional as original doesn’t have).

Stage 5a – Cut off three pearl/clear silicone legs (full length) and tie in at their midpoint on one side.
Stage 5b – Now fold the remaining halves over the binding to the opposite side and tie in.

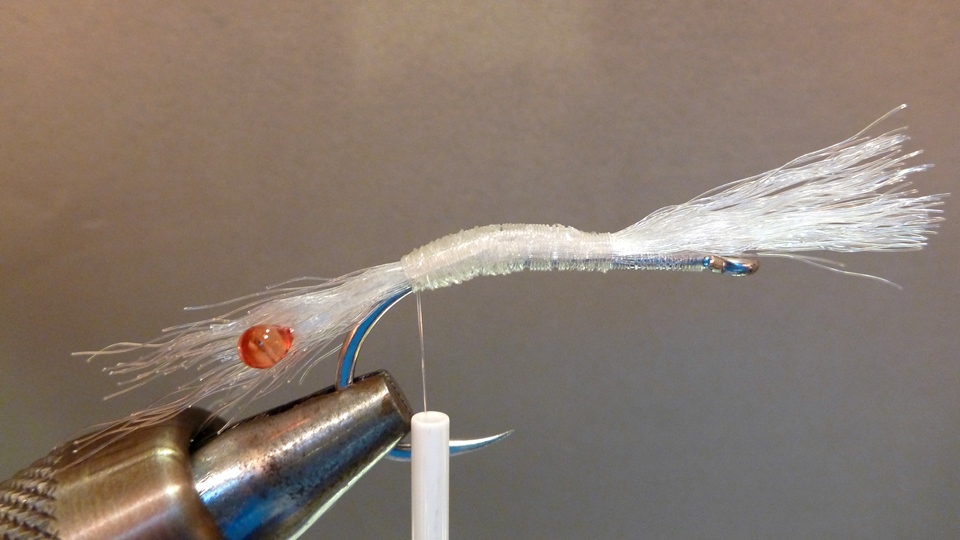
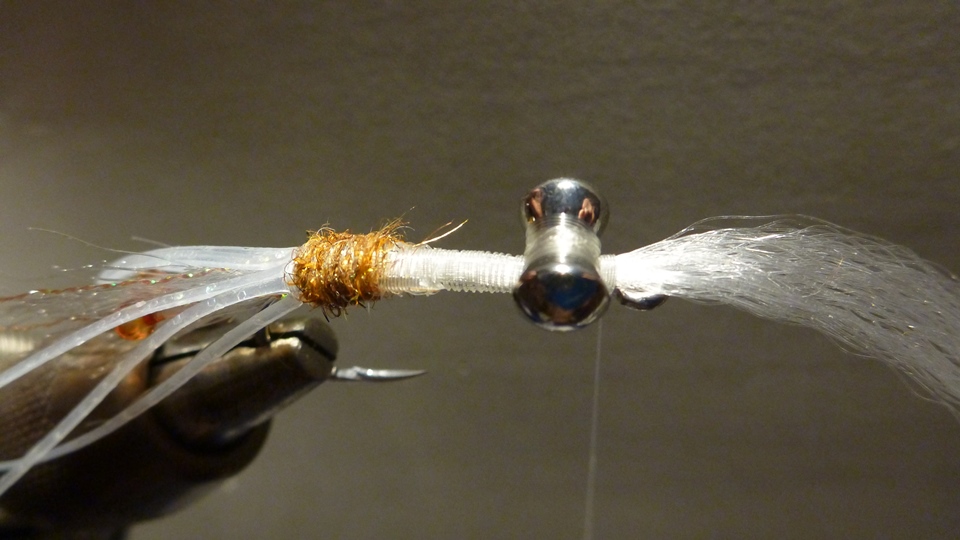
Stage 6a – Take the thread back almost to the front again and roll the selected dubbing onto the thread.

Stage 6b – Bind on about 4 wraps of the dubbing to form the head, then remove any excess dubbing from the thread and bind back over the dubbing to keep it compact (no loose straggly ends) to make the application of the resin a bit neater at the finishing stage. Advance the thread down to within about 4mm of the hook eye ready for the dumbbell weighted eyes. Note : Unique hair tail has been cut off about 5mm over the hook eye on this occasion.
Stage 7a – Tie in the silver dumbbell eyes on top of the hook shank (cross wraps/square lashings/cross wraps) then tie off the remaining Unique hair just behind the hook eye. Note : Unique hair tail has not been cut off on this occasion.
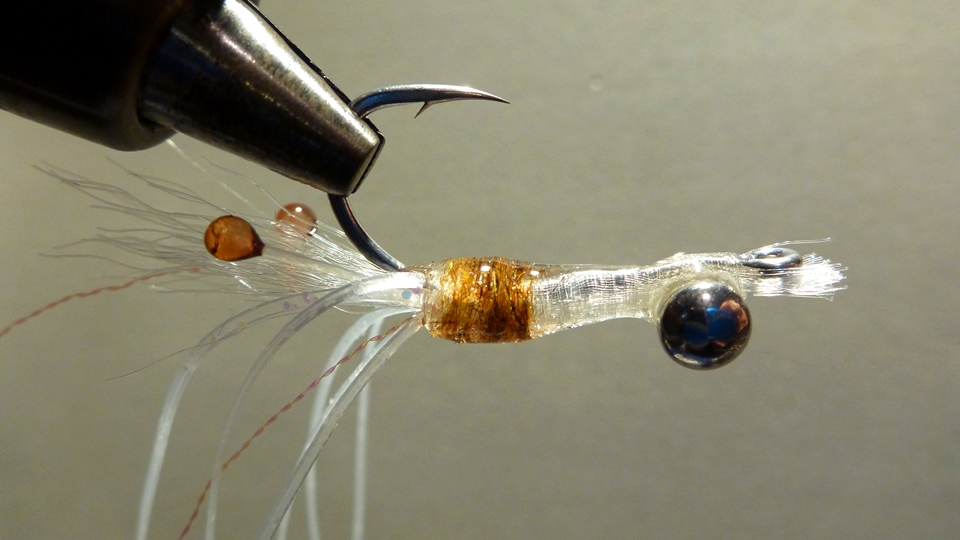
Stage 7b – Take the thread back over the dumbbell eyes, whip finish behind and cut off the thread. Also cut the Unique hair tail off so that it overlaps the hook eye by about 1½ – 2mm forming a small tail.

Stage 8 – This is the completed tie ready for the application of the epoxy or UV cure resin shell/body. Make sure to bend/splay the eye stalks a little to the desired position and ensure the dumbbell eyes are square to the hook shank (hook point sits vertical, not to one side). At this point you can also trim the silicone legs and feelers to approx. another 1½ hook lengths beyond the hook bend. I often cut two (one each side) of the legs 10mm shorter than the others to add a little more realism, but this is a personal choice.

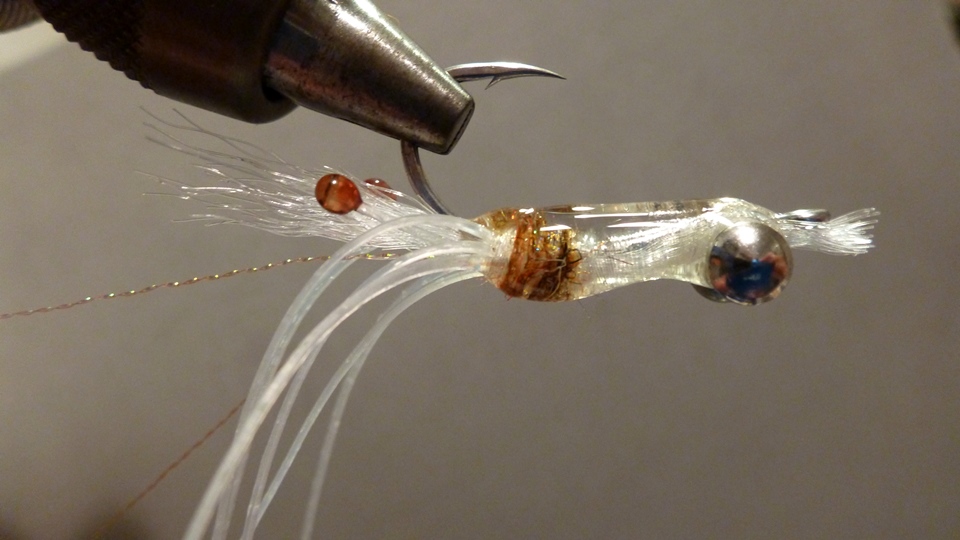
Stage 9a – Apply a coat of epoxy/UV fly finish to the entire body and bindings making sure not to block the hook eye.
Stage 9b – Apply a second coat to the top of the fly to form the shrimp like shell.
After curing apply a thin coat of Sally Hanson’s/Headset/Vinyl cement etc to remove any tackiness left over from the cured resin.
Stage 10 – Finished flies in both large (1/0#) and small (2#) sizes.
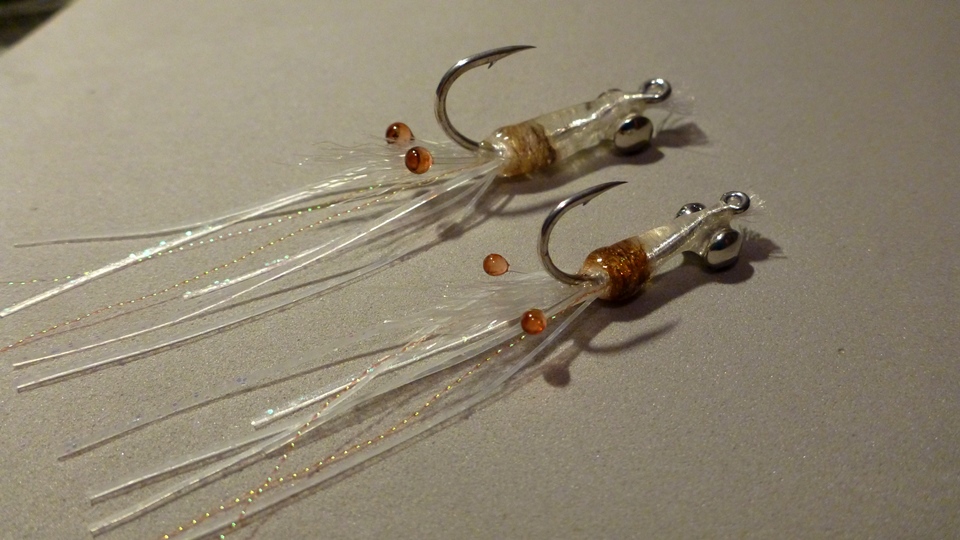
NOTE : Fish fly on an intermediate or sinking line with a fluorocarbon tippet (12 – 20lb) for best results. Fly can be fished dead (no movement) or with very short, small erratic strips or long extremely slow strips depending on the target species.