Alflexo Crab

A fly developed by the Seychelles guides.
Recipe
Hook – size 1 Mustad big game (or similar)
Thread – Flat waxed 210 denier, Tan
Weight – 1 x Lead dumbbell eyes, Large
Hot spot – 1 x Hot orange bead chain, Medium
Underbody – Super salt chenille, Tan
Body – Flex tube, small (6mm wide when flat)
Legs/Claws – Vernille chenille, Earthworm
Eyes – EP orange eyes on mono stalks, medium
Tools required – Bodkin, scissors, thread bobbin, leg threader, lighter, Stanley blade, headset/Sally Hanson’s etc, UV clear finish (thick), UV torch &marker pen (light walnut)
Step 1 – Lay a base of thread down to level with the hook barb.
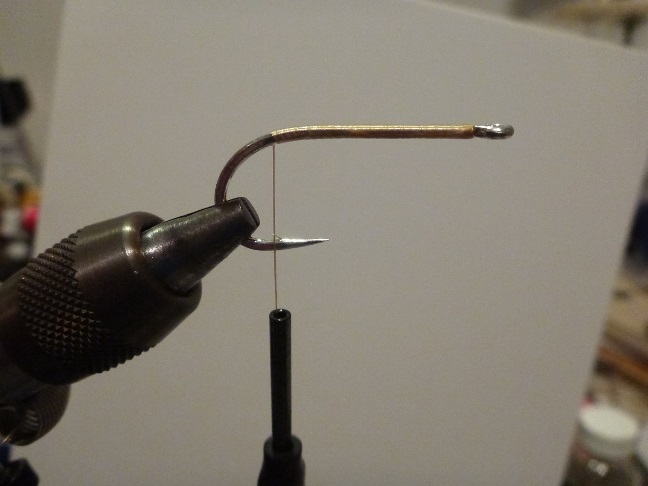
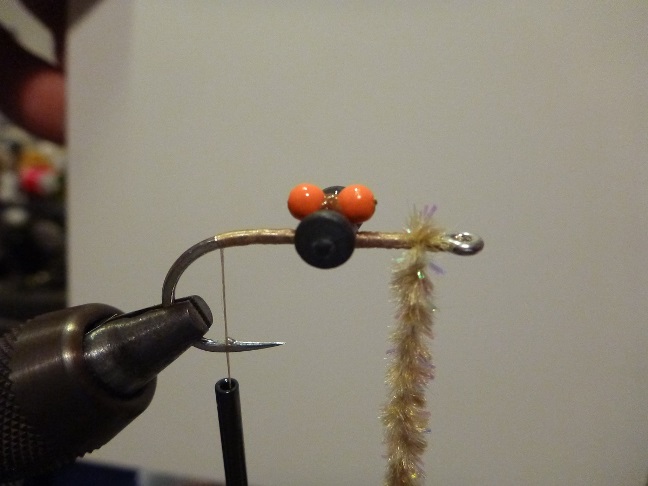
Step 2 – Work the thread back to the half way point of thread base and tie in lead dumbbell eyes on top of hook shank.
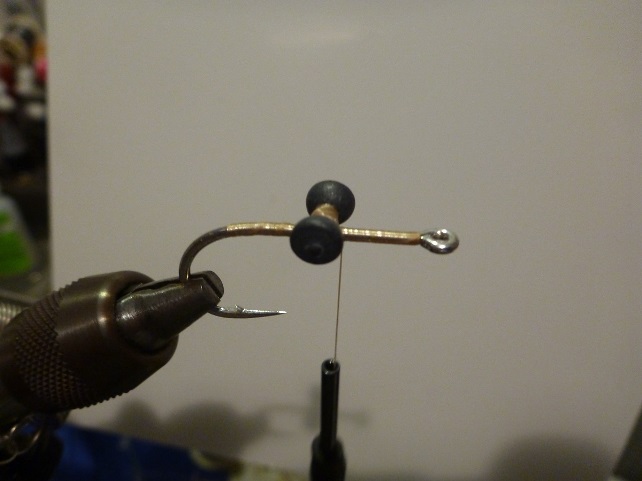
Step 3 – Tie in orange bead chain on top of lead eyes parallel to the hook shank, then turn the hook over and check the lead eyes are square (hook gape pointing up at 90°).
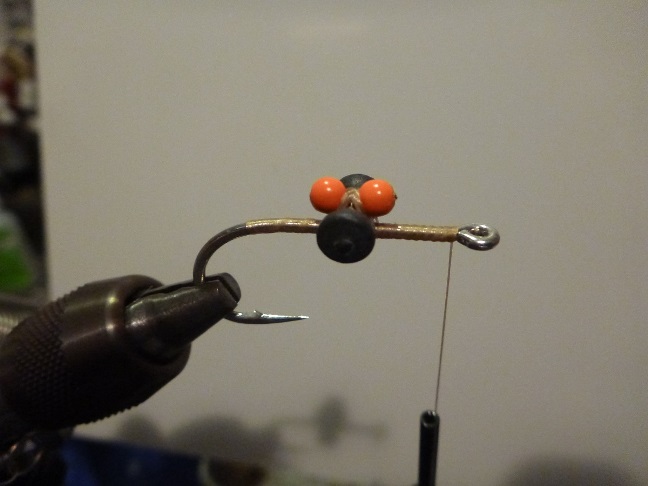
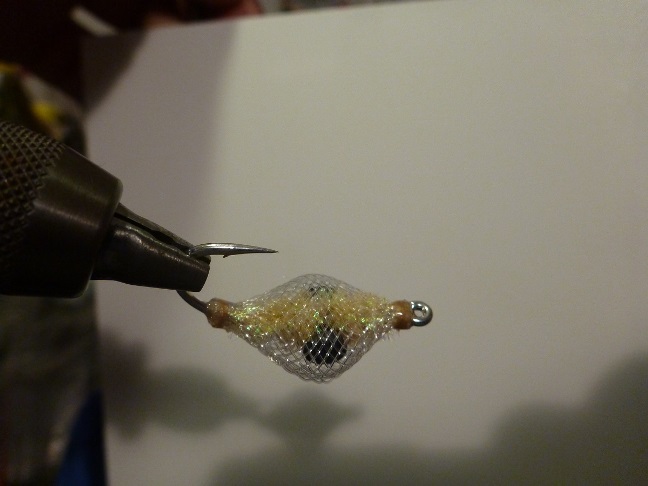
Step 4 – Tie in the tan super salt chenille at the hook eye and advance the thread back to the hook gape. Then wrap the chenille around the hook shank taking care to taper (more wraps closer to lead eyes) each side, crossing under the lead eyes, then tie off.
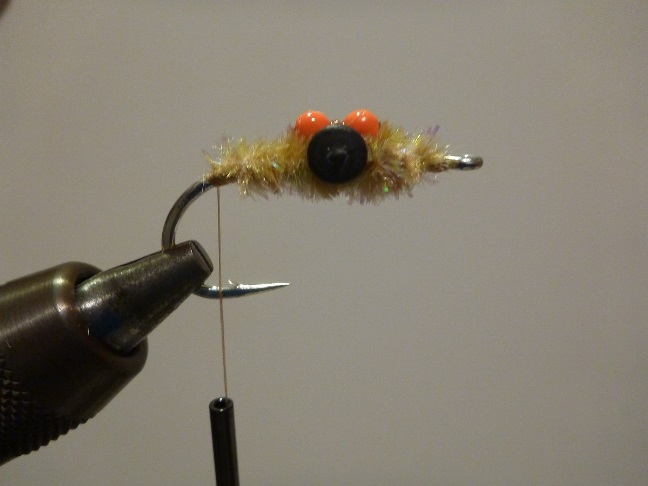
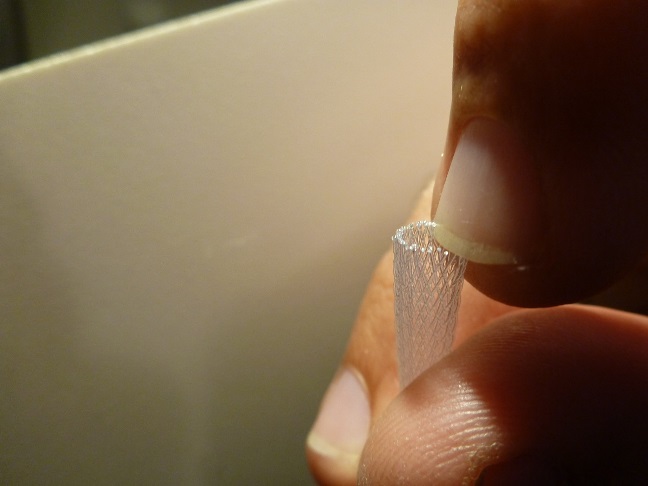
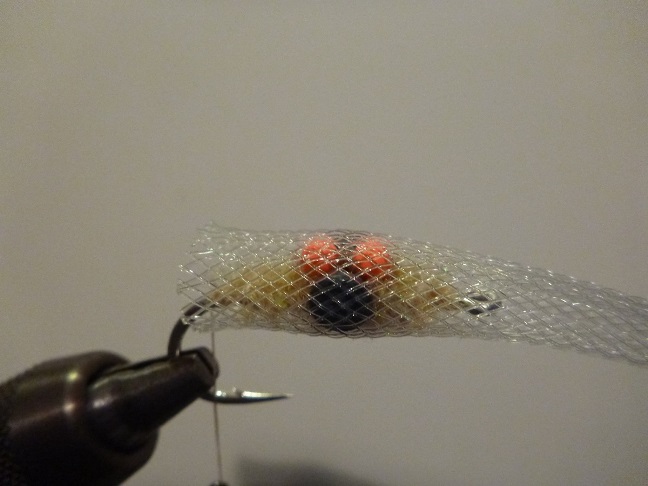
Step 5 – Cut off 50mm of flex tube then gently brush past the cut end with the lighter, the ends will slightly melt curling over. Make sure to separate the melted ends that may have stuck together with your finger nail before trying to thread it over the hook and eyes.


Step 6 – Thread the flex tube over the hook, eyes & chenille body with the flatter sides top and bottom and bind the end down tightly, whip finish and cut the thread off. Apply some headset/Sally Hanson’s etc. to this binding now to help seal it and hold it in place.
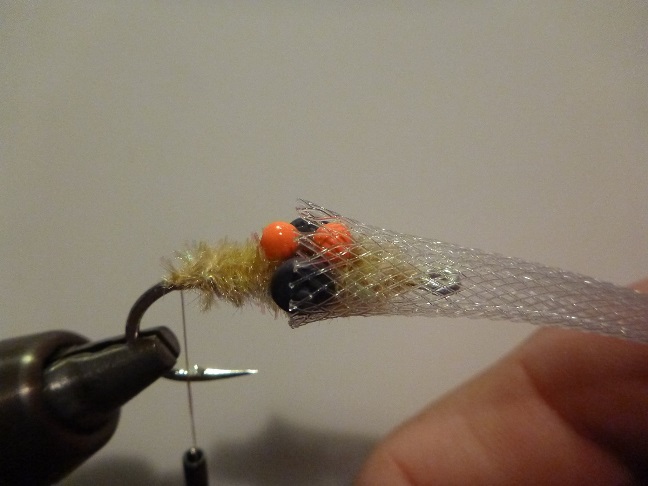
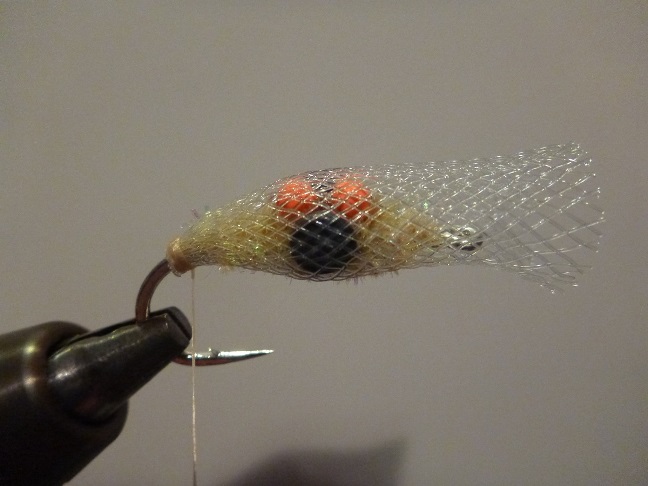
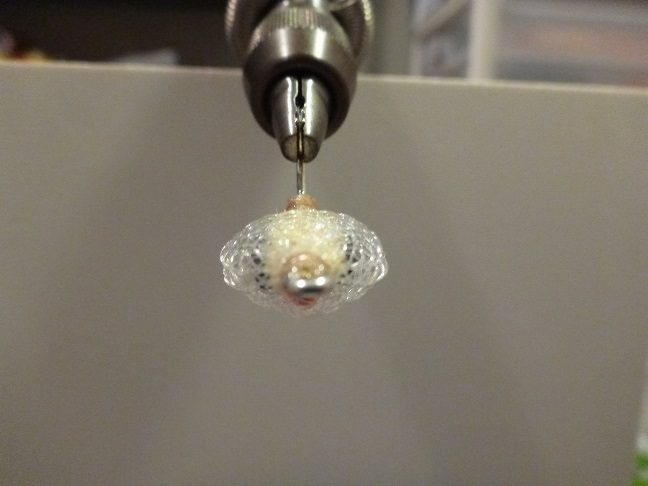
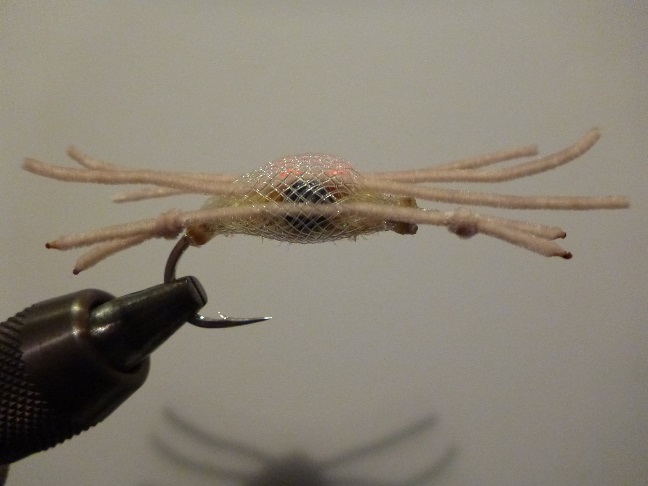
Step 7 – This step can be a little tricky. With your left hand (thumb on top) pull back the flex tube to flair it out forming the desired body size, with your thread trapped under that thumb also make several tight wraps with the thread (in right hand), whip finish and cut thread away. You can at this stage also pull and pinch the flared tube to ensure the body forms a flattish oval shape in cross section.

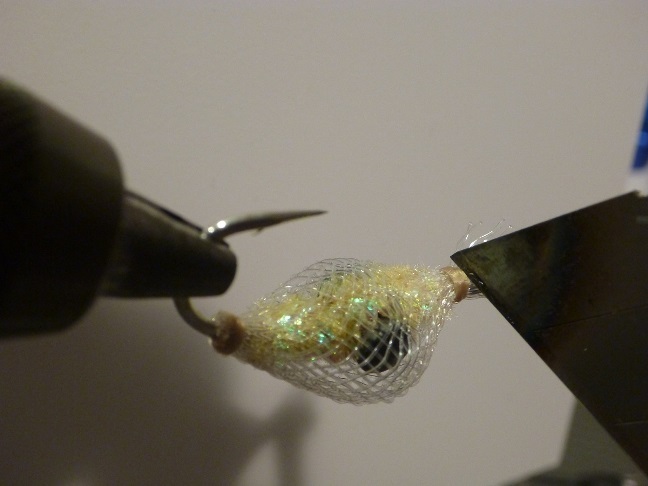
Step 8 – Use a lighter to heat a sharp Stanley blade and use it to neatly remove the frayed ends of the flex tube (you may have to do this a few times to get all the ends around the hook eye). Then check that the body is square to the hook and apply some headset/Sally Hanson’s to seal and hold the binding in place.

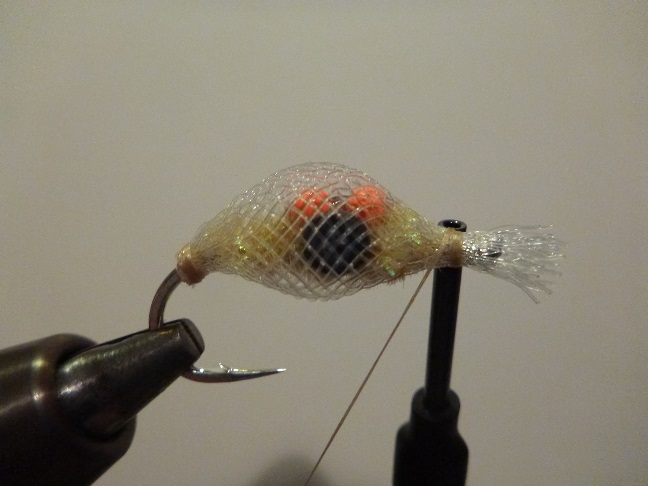
Step 9 – Cut 3 pieces about 70mm long of tan vernille chenille for legs and thread them through the flex body, one on the outside of the lead eyes and the next two between the lead eyes and the bead chain (either side). Remember to place the legs in the underside of the body (fly will ride hook point up)

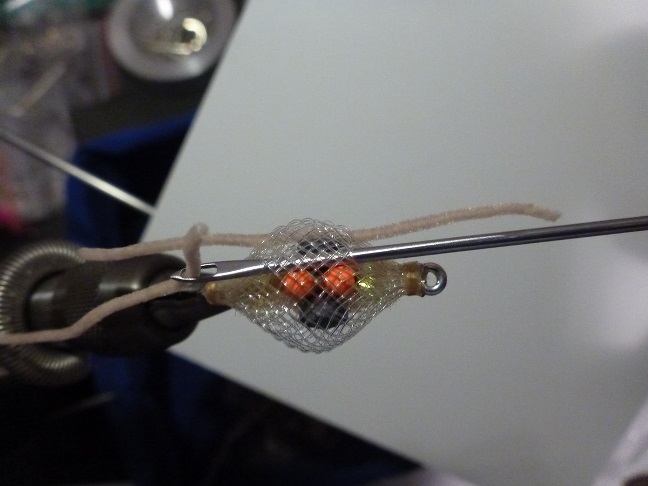
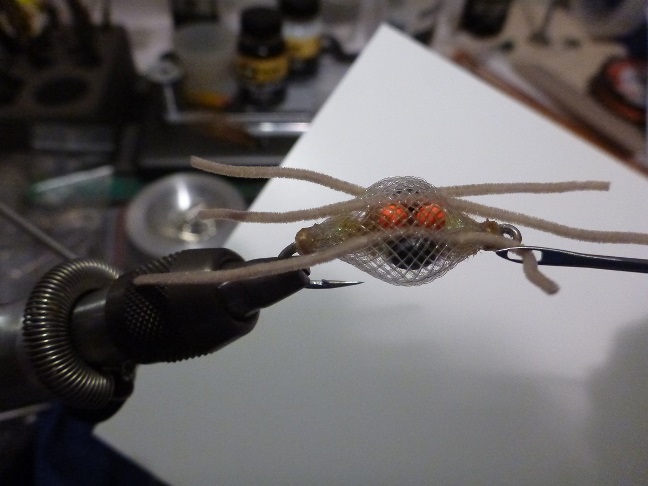
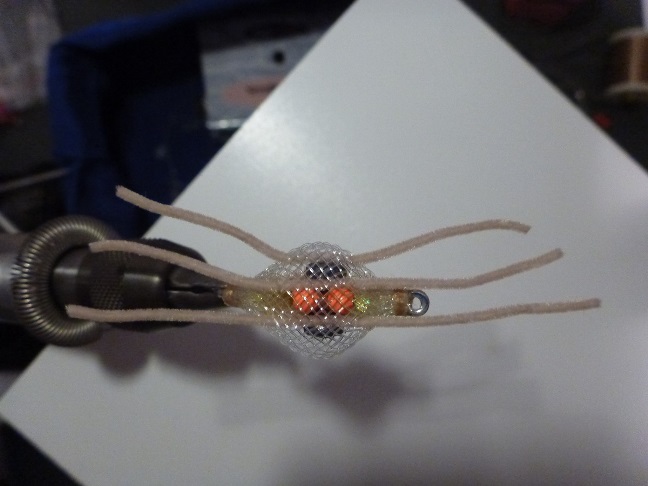
Step 10 – To form the claws cut a longer piece of vernille chenille (approx 100mm), tie a small loop in one end, cut the tag off tight then cut the loop off around 7mm from the knot and seal the cut loop ends with a lighter. Thread the loose end through the flex body roughly at the same level as the hook shank (lower than the legs), pulling the pre-formed claw tight to the body, then repeat the process above to form the other claw. Once completed pull the claws back to equalize.


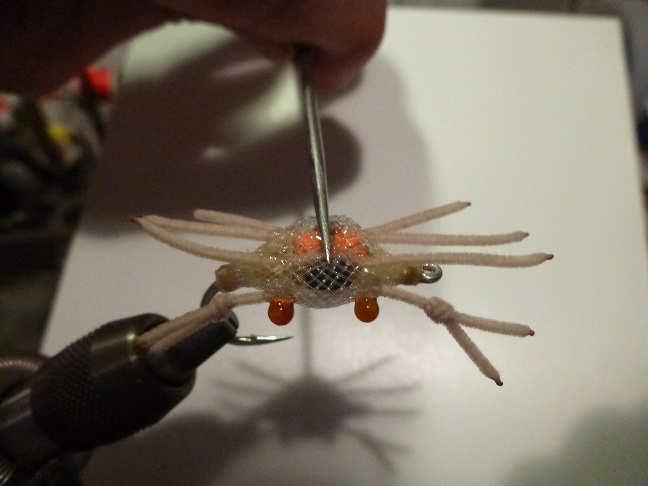
Step 11 – Poke two mono stalk eyes through the flex body a little lower and about the same point as the claws exit. Glue these in by pulling them out slightly and placing a small amount of UV glue on the back of the eye ball then pull them back into position and cure the glue (UV torch). Cut off the excess mono stalks at the rear.


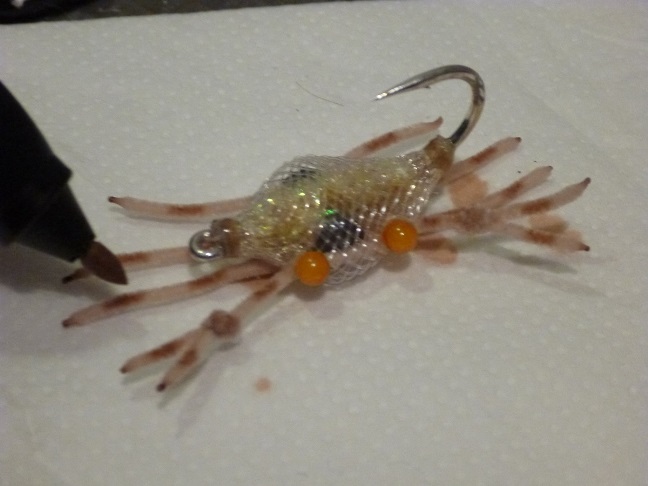
Step 12 – Cut the legs to length and seal the ends with the lighter. Place some UV glue in and around each leg and the claws where they exit the flex body and cure them in place (UV torch).


Step 13 – To make the underside of the crab a little flatter, place a good dob of UV glue on top of the bead chain, then using light pressure press your bodkin down onto the body and cure the glue (UV torch). Spin your bodkin around to release it from the glue.
Step 14 – : Use a marker to add colour to the legs and claws if desired.
Tie this fly in different colours depending on the prey items in your chosen fishing area.
